Set up a table
Tables help you review the same questions across several documents. Each row represents a document; each column holds a piece of information, such as the counterparty, governing law, or termination date.
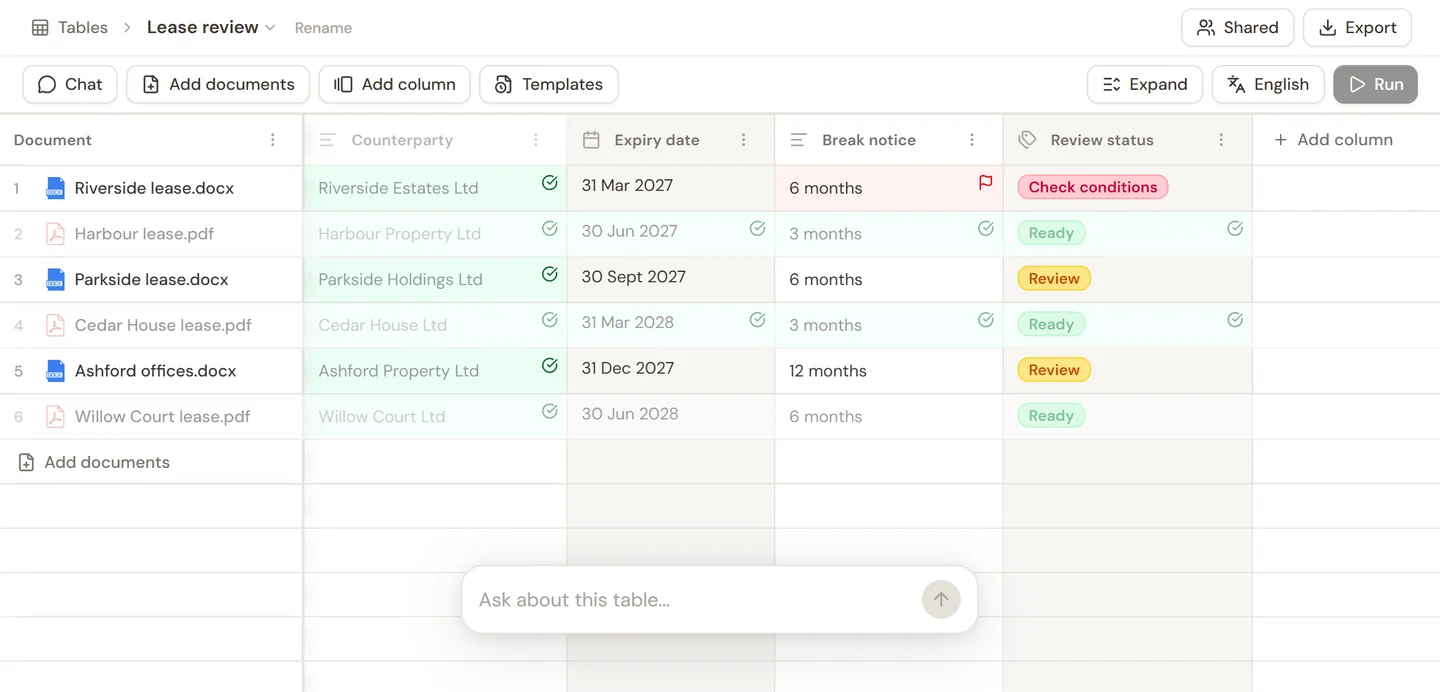
Create your table
- Open Tables in the Sonar Legal App and select New table.
- Give it a useful name.
- If the table belongs to a matter, use the matter assignment control. You can also create it from a matter's Tables view.
- Add the documents you want to review.
Use Add documents to upload files, import from OneDrive, or select files from a workspace. When selecting a workspace, check the files you want to add as rows, then confirm. Wait for the documents to finish processing.
Add columns
Choose the information you want to compare across the documents. You can create a column yourself, ask the table chat to suggest columns, or start from a template.
Create a column yourself
- Select Add column.
- Give it a clear name, such as “Notice deadline”.
- Choose the answer format. Use Date for a date you want to use in reminders.
- Write the question the column should answer for each document.
- Select Add, then use Run to fill the missing answers.
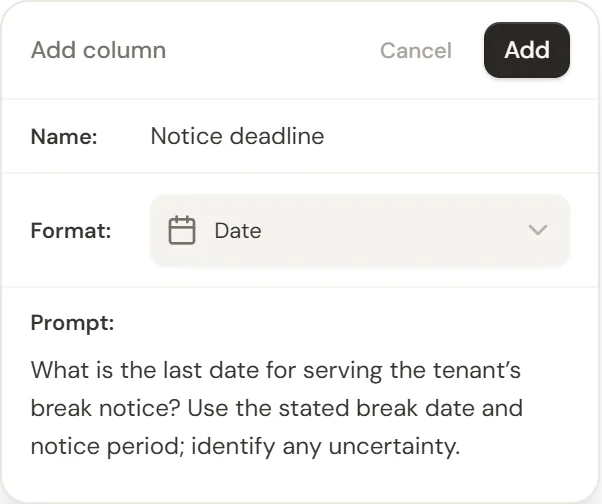
Make the question precise: “What is the notice period for termination for convenience?” is more useful than “Termination”. State whose rights you are asking about if the parties have different rights. Use text for a provision summary or tags for a limited set of categories. A date stored only as free text cannot be used as a date column for reminders.
Ask the chat to suggest columns
- Select Chat in the table toolbar.
- Describe what you need to capture. For example: “Suggest columns for governing law, tenant break conditions, and the deadline for serving break notice.”
- Read the Add these columns? proposal. It shows each column's name, answer format icon, and extraction question.
- Select Add 3 columns to approve this example, or Not now if the proposal needs changing. You can then tell the chat what to change.
- Once the columns appear in the table, select Run to fill their missing answers.
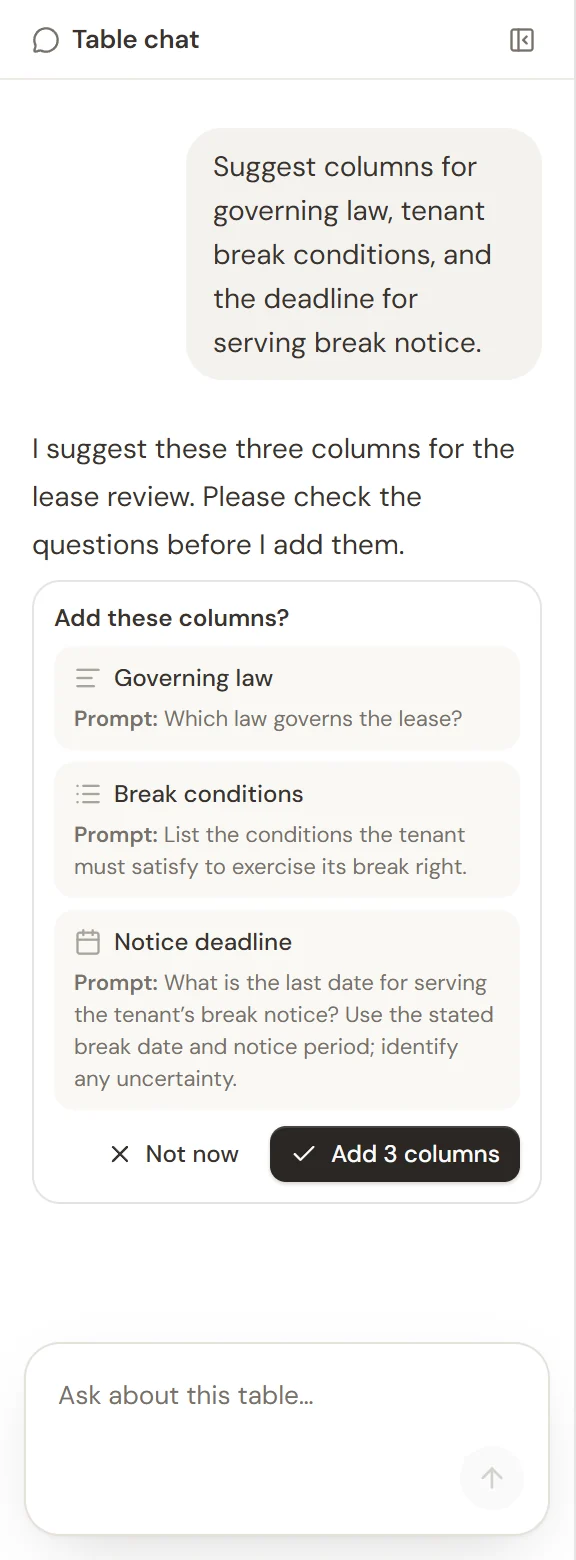
The suggestions are not yet columns in your table. Approve only the information you need for this review; you can refine a column's question later.
Start from a template
Open Templates and choose a prepared set of columns. Check the proposed questions and adapt them to the documents and the side you represent. After adding the columns, use Run to populate missing answers.
Review and refine the results
Run the relevant extraction from the table controls and wait for the answers. Open a cell to inspect its answer, reasoning, and supporting source where available. Edit a column's question when it is too broad, then run the column again if you need updated answers. Failed cells can be retried by running the relevant column again.
Use column menus to sort, filter, and organize the review. Share the table using its sharing control when colleagues need access; check the matter's access too if the table is linked to one.
Next, learn how to ask questions about a table or set reminders.